Installation & Setup
How to Add Lights to Outdoor Steps
9 min read
Adding lights to outdoor steps usually sounds simple until the questions start stacking up: where should the fixtures go, how do you hide the cable, and what happens when a connection needs service later?
A better install starts by treating the steps as both a safety feature and a wiring problem. If you solve both at the beginning, the finished result is cleaner and easier to trust.
Quick answer
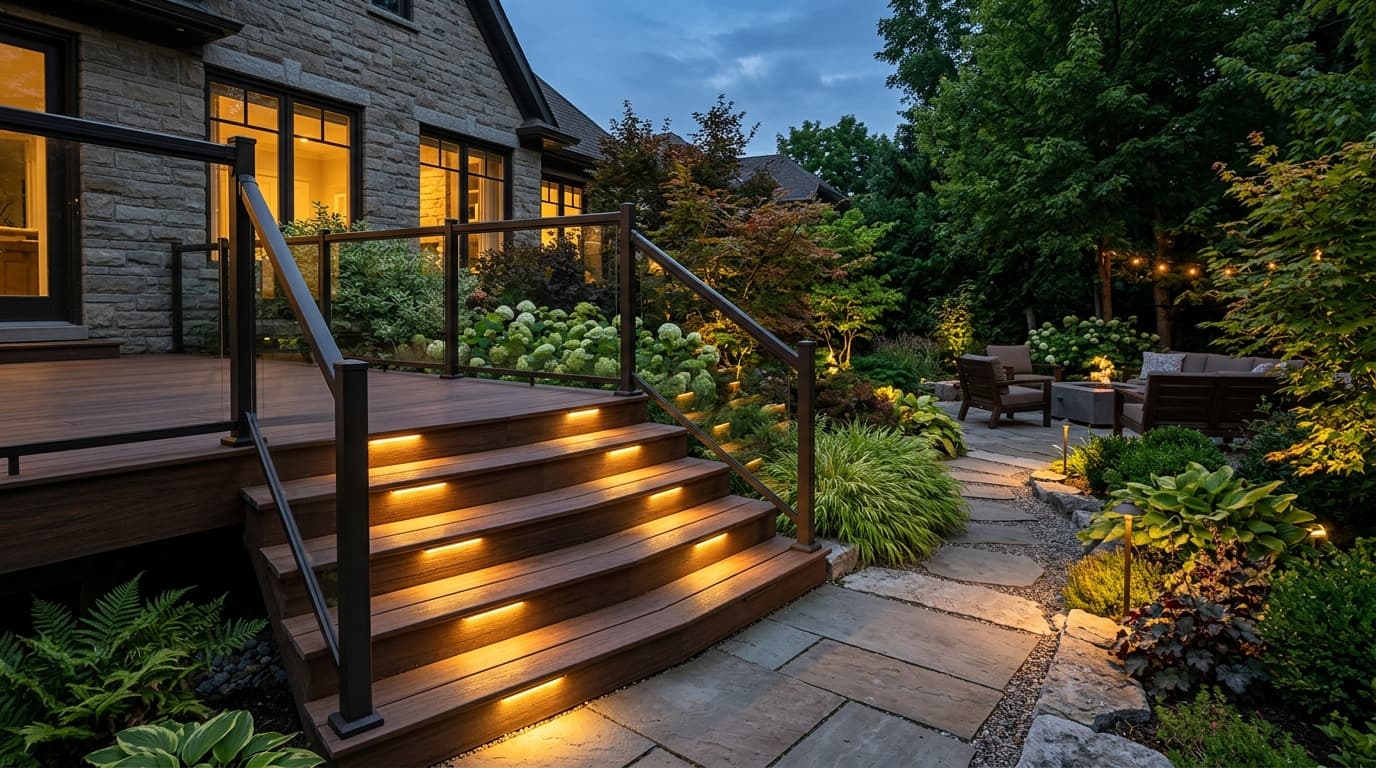
The best way to add lights to outdoor steps is to solve placement, cable routing, service access, and transformer reality before the stair assembly gets closed back up.
Start by deciding what kind of steps you have
Wood deck stairs, masonry entry stairs, retaining-wall steps, and composite stair assemblies do not all accept fixtures the same way. The structure determines which fixture styles are realistic and how the cable can be routed.
This is why product shopping should come after the stair assessment, not before it.
- Riser material and thickness
- Whether there is a wall or structure beside the stair run
- How easy it will be to hide and later reach the cable
- Whether the steps connect to a deck, porch, path, or retaining wall
Place the light where it shows the tread, not the bulb
The cleanest installations place the fixture so the tread is readable and the light source stays out of normal sightlines. That usually means low, shielded placement aimed down or across the walking surface.
If the first mock-up makes the stair brighter but harsher, the location is probably wrong even if the fixture itself is good.
Deeper reference
Keep the full homeowner guide on hand.
The book goes deeper on fixture selection, transformer sizing, wiring, voltage drop, automation, and building a landscape lighting plan from the first sketch through the final night look.
Plan the cable path before you cut or mount anything
Step-light installs get messy when the cable route is an afterthought. Before opening a riser, removing trim, or drilling masonry, map where the wire enters, where splices sit, and how future service would happen.
A slightly longer but cleaner route is usually better than the shortest path that leaves wire exposed or connections buried where you cannot reach them.
Treat service access as part of the design
Outdoor steps are a bad place for permanent mystery splices. If a light fails, you want a realistic way to inspect the connection without dismantling the whole stair assembly.
That might mean leaving access through removable trim, keeping the main splice at the base of the stair, or grouping the branch point where future digging is still manageable.
Check transformer load and run length before closing the job
Step lights are often only a few watts each, but several of them plus nearby path, wall, or accent lights can add up quickly. This matters even more when the steps sit on a long run at the far side of the yard.
Pressure-test the branch for transformer headroom, wire gauge, and voltage drop before you assume the far fixtures will perform just like the first ones.
Do the final aiming and glare check after dark
The install is not finished when the fixtures turn on. Walk the steps after dark from both directions. Sit nearby if the space includes seating. Look for hotspots, dark gaps, and direct bulb visibility.
That nighttime check is where a decent installation becomes a convincing one.
Next steps
If this page answered the first question, these are the next pages worth opening.
Landscape Lighting Transformer Planner
Pressure-test the added step-light load before you buy a transformer that has no room left.
Landscape Lighting Voltage Drop Calculator
Check the run if the steps sit far from the transformer or share a longer branch with other fixtures.
Landscape Lighting Connectors: What Homeowners Should Use
Open the connector guide if the install depends on clean taps, splices, or serviceable branch points.